Showing posts with label ye olde house. Show all posts

Thursday, January 24, 2008

raise high the roof beam, kristopher

(Alternate working title for this entry was “papa got a brand new shop-vac filter.”)

Those of you who enjoyed reading about my bathroom renovation project during the autumn of 2006 may be in for a real treat as I turn my eyes toward our unfinished attic. My goal is to determine the feasibility of converting it into a functional living space that would serve as a bedroom.

The first order of business is to clean up some 102 years worth of dust and to create strong, well-defined walking paths to help prevent anyone (say a contractor or myself) from crashing through the non-existent “floor” during subsequent inspections. Tomorrow I need to hang some brightly colored flagging tape in the areas right before where I’ve been crashing head first into the rafters while concentrating on proper feet placement.

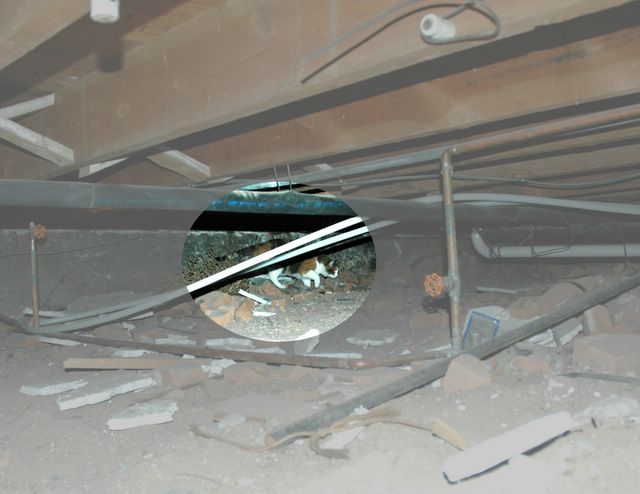
As it currently stands, the only access to the original attic is through a small hole cut into the roof. That portion of the roof was encapsulated within an addition that I believe dates to the 1920s. I can access that portion of the attic through a tiny trap door in the ceiling of our diner room. Two smaller attic areas resulting from later additions (40s and 50s?) are also present within the space. It is a real mishmash of rooflines, construction debris, and a jungle of old and new electrical wiring that would have made Nikola Tesla’s hair stand on end. The space probably should be cleaned up no matter what in order to help prevent termites from ever feeling welcome. Clearly too low for comfortable living spaces, those pockets still could provide an amazing amount of storage.


Not wanting to climb over the ductwork for our swamp cooler to access the main attic area, I set about creating a new “doorway” by removing the old wood shingles from the original roof, and cutting away sections of spaced sheathing between two rafters. It is still a tight squeeze, but if you can fit through the trap door in the ceiling, this is a slice of cake. To give you an idea of the size of the trap door, it is too small for my 10-gallon shop-vac to fit through. Luckily, I was able to remove the single window on the front of the house and pull the shop-vac up and through (in pieces).


It is very interesting how easily the old wooden shingles crumble in my hands. It is even more frightening to see how quickly they burn. Another great reason to get them out of the attic!

At first glance, and not knowing anything about the process, I estimate that there is enough space up there to at least proceed with the process. There are also a few issues that could possibly be addressed by a well-planned remodel. For instance, at some point in time, it appears that a large tree (I assume one of those hideous Chinese Elms that dot the neighborhood) crashed into the roof and damaged a couple of rafters. Possibly, that area would be a good choice for the location of a dormer. Quite possibly, having the ability to show existing damage that should be repaired would go provide a good starting point when explaining any proposed project to the historic buildings commission. I’m quite sure that they would have to approve the addition of something such as a dormer or even a skylight.

I know they sometimes offer tax credits to refurbishing historic structures, but I’m not sure if that includes just repairing a roof. Obviously that is something else to check into before making any decisions.

Watch for more exciting updates in the near future!

Friday, December 28, 2007

Lettie Watson Mize: an introduction

Way back when I used to do archaeology, one of the questions someone was always asking me was, “How do you know where to dig?” If I answered them honestly, I would reply, “If it was up to me, I sure as hell wouldn’t be digging here.” Of course an answer like that would require some explaining, and that would take time- something that was usually at least as precious as having enough water for the day while taking a pounding from the sun in the middle of the Sonoran desert.

The bottom line is that roughly 100 percent of every archaeological project I was ever paid to work on was driven by some pending construction project that had some level of governmental funding, and therefore required cultural resource studies to be completed. Ideally, those studies would be completed before the project got underway, but I think most of us here are adult enough to accept that we don’t live in a perfect world.

On the other hand, some of the “neatest” projects I ever worked on were done so on a volunteer basis. The kool thing about a volunteer project is that you are able to pick and choose the ones to invest your time and energies in. So if you think it sounds like a crackpot idea, not getting involved is always an option. Oddly enough, I can’t name a single historical project where I ever volunteered my help.

I guess that all changed for me when we bought our house in 2004 and I began wondering about the people who had lived here at different times over the past 100 years. Basic questions like “Who were they,” and “What sorts of things did they do?” Unfortunately, it seems that when you buy a house, a comprehensive listing of that sort thing isn’t included. Perhaps it should be. Then again, I quickly learned that the process of figuring out answers to my questions is as entertaining as it is challenging.

The initial challenge is deciding where, and how, to dig without a shovel. Armed with pencil, a notebook and the knowledge that our house was listed on the New Mexico State Register of Historic Places as the “Lettie Watson House,” I made my first of many walks to the historic records library. Once there, I set about going through all of the available* Albuquerque city directories published since 1904 and making a list of the names of people who lived in our house. (*Note: Not surprisingly, they don’t have city directories for every year, so my data was almost immediately compromised.) In addition to keeping track of the occupations of all the people who lived in the house, my database also included names and address for anyone named Watson or Mize (Lettie’s eventual married name) to possibly assist with my long range plan of finding living descendants who might be able to provide old photographs of the house or people who lived in it over the decades.

This undertaking was going to take a considerable amount of time and dedication in order to make any progress, not to mention ample portions of good luck. Eventually I had pieced together enough information that I started to think of my database as the exterior portion of a jigsaw puzzle. You know, the pieces with one straight edge. To be sure, there were still some missing pieces, including a couple of the corners, but at least I had some firm lines to build upon.

From that information alone I was able to figure out that Lettie had lived in our house “pretty much” all the time from 1906 or 1907 through the mid 1950s. Her mother, Louise Watson, had lived here “more or less” all the time that same period until she passed away right before the Great Depression. Lettie had married a meat cutter named Isaac Mize, who used to work across the street from the school where Lettie had been employed as a teacher. (Yes, part of my research includes walkabouts so I can make observations of the actual structures and properties in order to better visualize the physical environment rather than trying to imagine it in my brain that is already stuffed with numbers and names and such.) I also had determined that Lettie and Isaac had at least one child named Henrietta, but that was pretty much the end of that source.

Eventually, additional investigative work led to my discovery of Lettie’s gravesite in a cemetery just a few miles north of the house. Her mother had been buried on one side, her husband on the other. A thorough search of the surrounding area failed to reveal her daughter’s grave, and I chose to think of that as a good sign that she had either moved away, or was still living. The possibility that she had married and produced children was the best-case scenario.

Although you might suspect that finding someone’s headstone would be somewhat of a dead end, it is in reality quite the opposite for a historian. Those grave markers actually provided key information that I needed to push forward- dates of death. With that information, I was able to quickly locate appropriate obituaries by accessing copies of old newspapers on microfilm at the library. Without those dates, I wouldn’t even have attempted such a task.

There are some fantastic cemetery websites available to today’s historians. One that I am particularly fond of is called Find a Grave. I plan on supporting that site by adding the information I gather from this project, as well as posting photos I snap of random headstones. If I end up helping a single historian or genealogist on a future project even if by accident, then it is well worth the effort it takes to upload a few images.

It seems important to state that the discovery of these obituaries has led to the unearthing of a wealth of data about Lettie and her family. In turn, that information has set my research on a course that I had not anticipated. While I ponder what to do with the information, it makes sense for me to begin writing short biographies of the people involved- noting that these bios will require modification as additional information becomes available.

This blog seems an appropriate place as any to post them, and it seems only fitting to begin with what I’ve learned about Lettie. Assuming I fail to find a different voice to describe other people encountered in my research, they will be discussed based on their relationship to Lettie, or to the historic property itself.

Lettie W. (Watson) Mize


Lettie W. Watson was born on the westernmost edge of the United States on November 26, 1881 in New Santa Fe, Missouri. Today, only a small cemetery surrounded by a wrought iron fence remains of the town that once served as the virtual starting line for the Santa Fe Trail. Born ten years after her parents Dr. John Ellis Watson and Louisa S. Lipscomb were married, Lettie grew up with one sister, Alma Watson (Horton), and one brother, Dr. Frank L. Watson.

Following the death of Lettie's father, her mother packed up the house and moved to Albuquerque in 1905 with Lettie and Alma in tow. At present, there is no evidence to suggest that Frank moved to Albuquerque. It is reported that he was living in McAllister, Oklahoma in 1928. Louisa and Lettie became the first residents of the brand new house at 316 Walter Street sometime between 1906 and 1907. It is unclear whether or not Alma also lived here or elsewhere in the city.

By 1907, Lettie was employed as a teacher at the First Ward School. By 1911, she had taught at the Third and Second ward schools. Not long after that, she had married a butcher named Isaac Mize, and given birth to two children- Henrietta in 1913 and Wallace (date unknown- but I am working on it).

By the end of the 1920s, Lettie was employed as an “expression teacher,” a job I believe she performed here in the house. If you have any idea what an “expression teacher” did, please shoot me a comment. I am of the belief that she coached people in the art of public speaking or debate.

The last time I can confidently place Lettie in the house was 1955, but I suspect she remained in Albuquerque after she moved. A charter member of Monte Vista Christian Church, Lettie also served as a regent of the Lew Wallace Chapter of the National Society of the Daughter of the American Revolution.

Lettie passed away following a long illness at the age of 90 on July 8, 1972, exactly 33 years and one day after the death of her husband Isaac.

Wednesday, November 22, 2006

the forkcast

First, some HUGE news! It seems that I hit the Powerball last week. No kidding! And considering that the holiday season is upon us, it couldn’t have happened at a better time.


Of course, the majority of the winnings have been earmarked to help offset the cost of the bathroom remodel. Speaking of which, I am very excited to announce that the project has at last come to an end. I would categorize any work needs that arise at this point as repair or maintenance issues. Additionally, I have tentatively scheduled the remodeling of the other bathroom for autumn in the year 2525.


Sunday, November 19, 2006

kuriosity

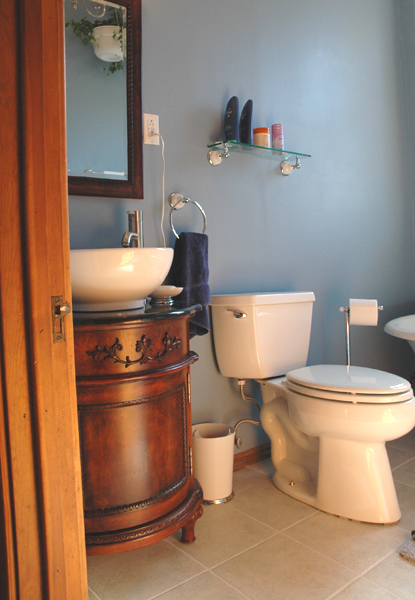
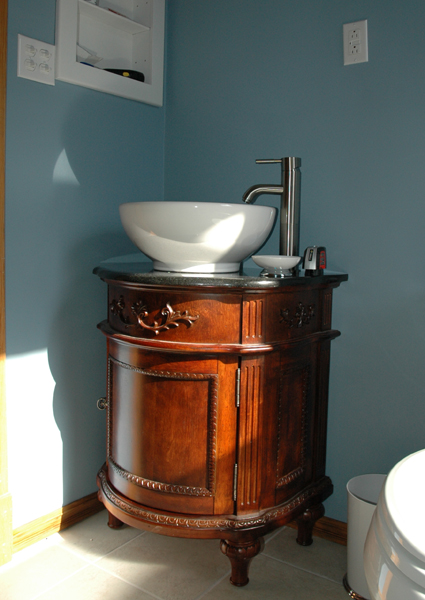
Have installed the new vanity and wash basin. I had a few issues with leaking in the drain line, but appear to have taken care of it by adding more Teflon tape and applying a bit more effort at tightening the fittings by hand.


Tasks are beginning to dwindle as I find myself now installing accessories such as mirrors and towels holders. Once again, thank goodness for my “helper.”

Friday, November 17, 2006

behold... the throne

I now have the new toilet installed. Will wait a few days and continue to inspect for leakage before I caulk around the base.

Thursday, November 16, 2006

drop the plug

After trying to stop the previously mentioned leaks using first Teflon tape, then more torque, then joint compound- and watching all attempts drip to failure, I finally got some decent results using extra heavy Teflon tape.


Now while I wait anxiously to see if the seals will hold, I have a few moments to contemplate the age-old question, “How long can a person realistically expect to keep an entire family waiting to begin splashing around?”

Monday, November 13, 2006

rub a dub dub

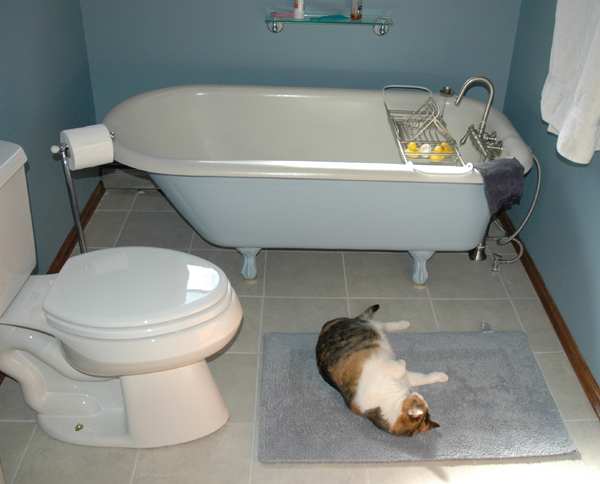
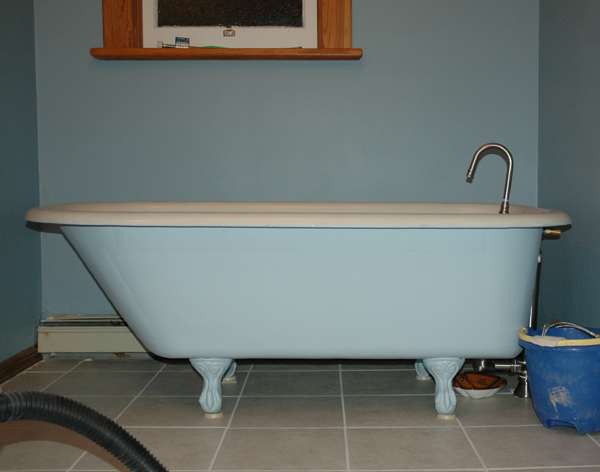
In between hockey games, I managed to finish painting the tub and actually move it back into the bathroom. If you’ve ever moved one of these things by yourself, then you can appreciate that I didn’t smash any of my fingers or toes in the process.


Is that a light at the end of the tunnel? Why yes it is. Unfortunately, that light represents leaks at both the hot and cold water supply lines where the ½-inch brass nipples feed into the ¾-inch input lines in the back of the faucet. Frustrated by the steady dripping, I disassembled that portion and will try again in a couple of days after I return from Arizona. I’m hoping that all I need is MORE Teflon tape and additional torque.

Once the tub is set, remaining tasks include installation of the new toilet and vanity/sink. I am also still searching for a nice cabinet that will fit in the corner behind the door. I am surprised that I can’t seem to locate any FREE plans to build my own cabinet on the interweb. What’s up with that?

Tuesday, November 07, 2006

as seen in refrigerator

One neat little tip I’m happy to pass along is my method of dealing with a paint roller that I don’t feel like taking the time to clean properly. Not necessarily because I’m lazy, but rather because I am waiting for a coat of paint to dry and expect to be using it again in the near future.

Without removing the foam pad from the roller, I place the wet paint-covered portion in a one-gallon zip lock bag, and jam the entire contraption in the fridge. I’m sure there are a number of possible variations of the same idea, but I’ve found that everything works best when I place the handle upright and use masking tape to secure it to a shelf. This helps ensure that the roller doesn’t leap out of the fridge when someone else opens the door. Also, I recommend keeping the handle in the vicinity of the beer shelf in order to prevent injuring muscles that may not be used to stretching to other locations- say to a vegetable crisper for instance. (Of course I’m not claiming that my wife actually approves of this method, but as long as the project continues to move along, she seems willing to put up with oddities such as this.)


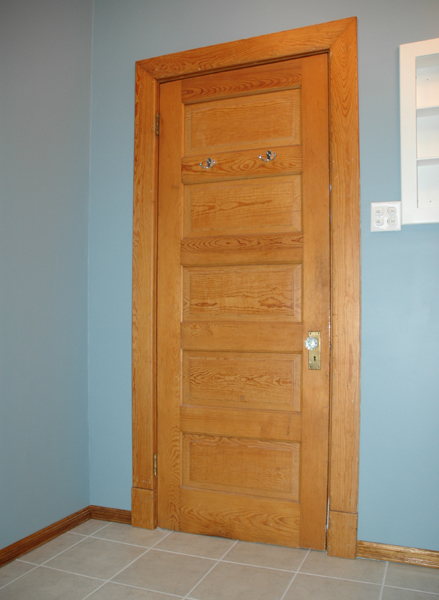
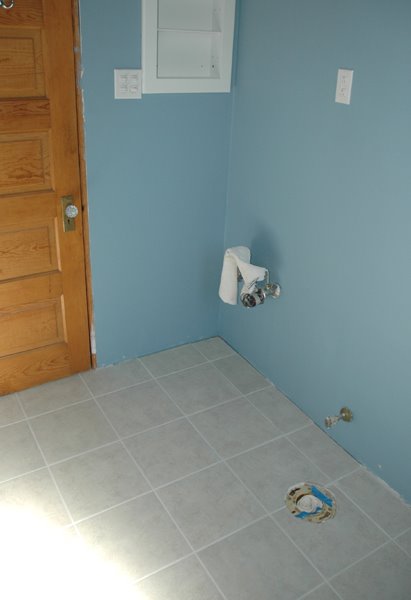
Speaking of progress, I finished cleaning the old caulking and paint remnants from the window and door trim, and have gotten all that lumber reinstalled. Also, I decided to use relatively narrow, decorative pine casing for the floor trim after considering the new vanity and the location of an existing water supply pipe. I believe the shortness of the trim will only help draw attention to the height of the walls, making the room seem as large as possible. As illustrated in these photos, I have gotten the trim cut to length and fit (more or less), sanded, stained (used Olympic One Step), and installed. I used a punch to sink the nail heads beneath the surface of the wood.


Although I should probably be busy filling in the resulting divots with wood putty, I’m going to take a few more seconds to mention something I consider unusual. I assume that we've all found ourselves on one side or other (possibly both) of the age-old argument: "What is proper- "grilled cheese" or "toasted cheese" sandwich?"

Have you seen the Hamilton Beach commercial for the Toastation toaster and oven? It’s the one where the woman whips out the term "cheese toast." I'm left wondering if this is a completely new phrase, or has anyone ever heard of it before? They even have a photo of this "new" dish on their website.

Monday, October 30, 2006

grout expectations

According to my knees, I’m finished with the grout portion of the program.


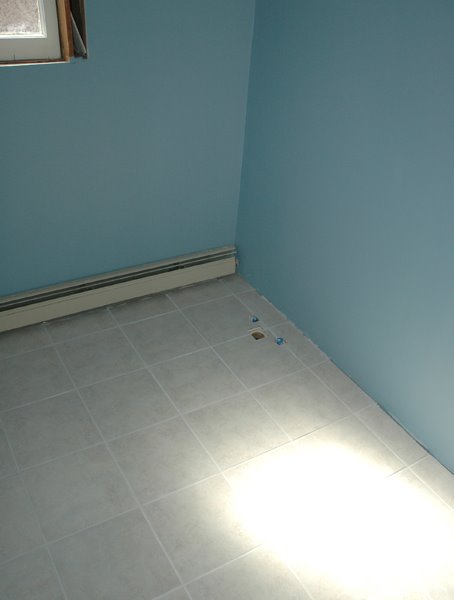
I applied Mapei brand “warm gr(e)y” Keracolor S grout, hoping that it wouldn’t argue with the 12-inch Glacier Bay “Arctic Blue” porcelain tiles I had set into Mapei Ultracontact full-contact mortar. The application went well, and the clean up really only required a solid block of time and lots of elbow grease.


The floor has a few issues, but in general I’m pleased with the outcome. Tiling is definitely something that I wouldn’t want to do five (or more) days a week.

Monday, October 23, 2006

progress

I finally finished setting all the floor tiles in the bathroom. After messing around trying to make my cuts using a coping saw with a diamond-coated blade, and then a borrowed tile hand saw, I ended up punting and heading back to the hardware store for a wet saw. About three hours after I returned home, I not only had all my tiles cut, but also had found extra time to water the remaining plants in the garden (strawberries, sunflowers, hollyhocks, grapes, marigolds, tomatoes and cantaloupes). I plan on returning the pair of tile nippers I bought but never used.

I began laying the special cut and border tiles right after watching the Tigers tie the Cardinals in World Series at one game each. I ended up with two full tiles and some change to spare. Now that I have that done and all the cat thin-set footprints wiped up off the hardwood floors, I’ll let it rest for a full day before I think about adding any grout.

I need to add another coat of paint to the window before I reinstall the trim. I also need to select and install the baseboard molding and repaint the bathtub exterior before I can start putting in the fixtures. I’m finally beginning to feel like I’m turning the corner on this remodeling project.

Friday, October 20, 2006

needling

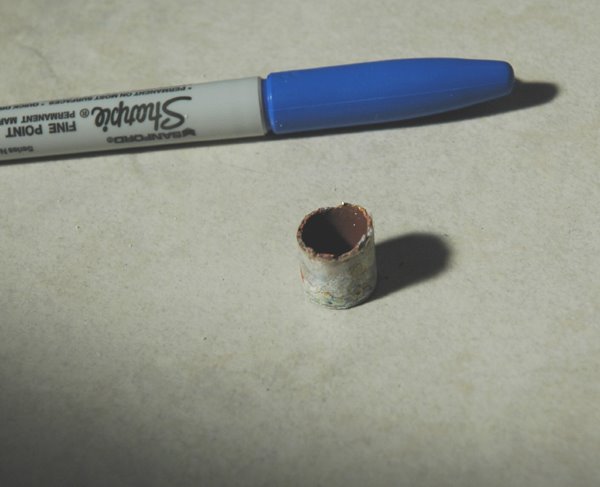
Taking a step back to consider my options for cutting tiles for the area surrounding the bathtub plumbing fixtures, I decided to take a closer look at that cold water supply line that I believed to be broken. Utilizing a pair of needle nose pliers and an ample amount of determination, I was finally able to extract a broken piece of pipe that measures about ½-inch in length from inside the connection.


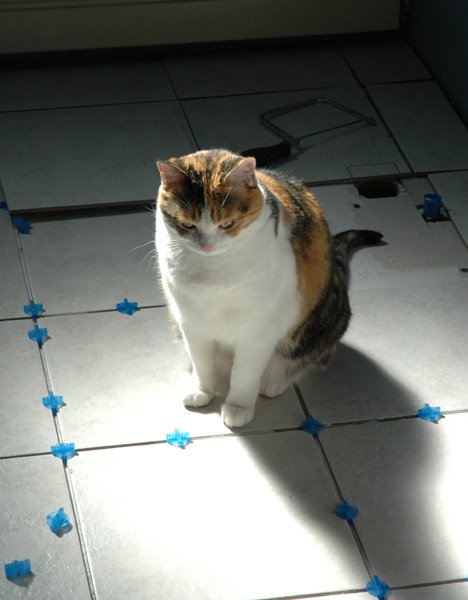
Although several of you are becoming bored with how long it is taking me to tile the floor, I must say that my assistant seems perfectly content to pass the time by scooting the plastic tile spacers around the floor as if they were hockey pucks.


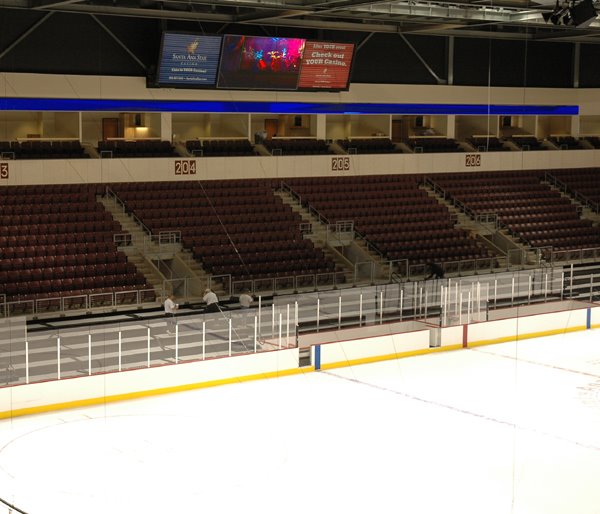
Speaking of hockey, Saturday is the open house at the brand new Santa Ana Star Center in Rio Rancho. This is where our hockey team, the New Mexico Scorpions, will begin playing home games next Friday. I will be operating the four DAKtronics matrix signs during games, and will also be called upon to direct some of the video productions. That will entail calling for shots from the three cameras, editing and playing instant replays, and running sponsor commercials and appropriate video clips from movies such as Slap Shot and Strange Brew. I don’t think these games will be available for viewing online, but then I may be wrong.

Tuesday, October 17, 2006

tiling for dollars

Okay, I got the full field tiles set, now will let the thin-set cure while I run to a bar and watch game 5 of the National League Championship Series and ponder the cuts I need to make for the remainder of the room.

Monday, October 09, 2006

unexpected progress

Monday’s events at the balloon fiesta were rained out, so I took advantage of the down time and installed the cabinet in the bathroom wall. Granted, it isn’t a giant leap forward, but it does represent one less task to complete.


I also began messing around with various possible tile layouts to see what looks best. Unfortunately, I don’t think the easiest method (just leaving them all stacked in the corner of the room) is going to fly.

Friday, October 06, 2006

screwed

The working title for this post was "Lessons Learned," but I decided that this one was, well... sexier.

Having already cut my cementboard and laid it out in the room to make sure it would fit properly, I set out last night to install the 1/4-inch-thick panels one at a time. First I mixed up a supply of thin-set, re-explained the ground rules to both cats, popped a beer, cranked some Supertramp, and began applying the mortar to the floor. After carefully setting the first panel, I climbed on top to begin driving my Superiorbilt 1-1/4" backerboard screws. I initially set a screw by tapping the tip into the cementboard with a hammer, then driving it home with my 18-volt Black & Decker Firestorm drill/driver. Just as the flat screw head approached the surface of the cementboard... SNAP!... busted the tip off my driver bit. Not good!

Luckily, I had more bits that came with my RYBOI drill. Unfortunately, they didn't fare a heck of a lot better. I ended up breaking each of the eight driver bits I had, yet had failed to drive all the screws I needed to secure even the first panel. Of course by that time it was too late to make a run to Lowe's (but only because they still haven't issued me my own key). Unable to continue with that particular task, I took the remaining mortar outside and applied it to the surface of the adobe blocks that form one of my raised garden beds. Not exactly what it was made for, but at least it wasn't a complete waste, as it will help deter erosion.

Made a quick hardware run today and picked up the following: a six-pack of DeWalt double headed #2 bits, a six-pack of 1-inch Bosch titanium #2 screwdriving bits and a three-pack of 2-inch Bosch titanium #2 screwdriving bits that fit into the keyless chuck portion of my driver. I figured that if I couldn’t get the job done with all these, that I would finish up using a sledgehammer (even though that would require yet another trip to Lowe’s). As it turned out, I was able to drive all remaining screws (150+) using a single Bosch titanium bit. Afterwards, that bit looked nearly as good as the other two that are still in the package.

Lesson learned: Don't attempt projects similar to mine with crappy tools or materials. It will only lead to frustration and extra trips to the hardware store.

Another example of the same lesson was this plastic three-sided taping knife I bought (featuring a 4-inch, 6-inch, and 10-inch blades) for the dry walling portion of the project. This hunk of junk wasn't worth the time I wasted patting myself on the back for the money I had saved by not purchasing the recommended metal taping knives. I picked those up the day after I broke the cheap plastic one, and they made the job much easier.

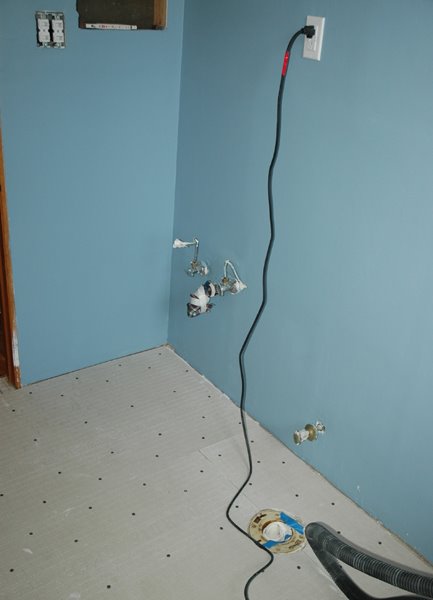
At any rate, I have now have the entire floor covered with backerboard, and the seams have been taped and mortared (although I hadn't gotten that done when I took these photos). I don't anticipate actually beginning to set the tile until after the balloon festival wraps up on the 15th. I also recently picked up a pair of hard shell kneepads to ensure that I don't aggravate an old Nerf football injury.


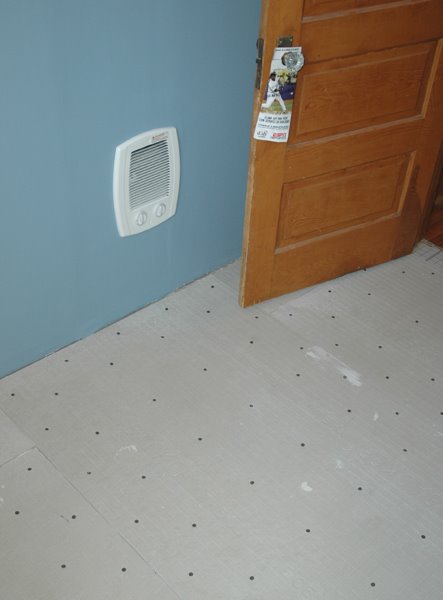
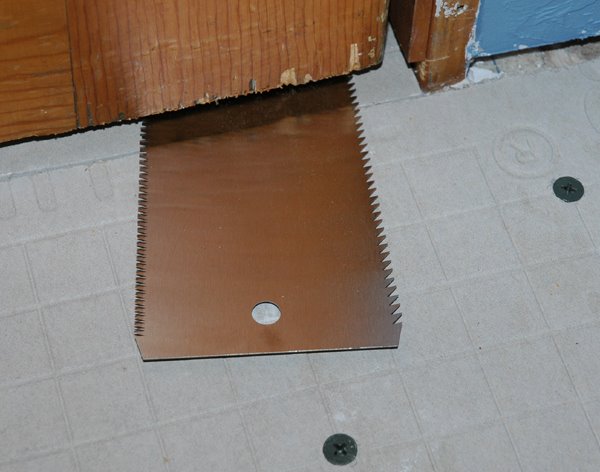
I utilized a Vaughan double-edged (medium rip cut / extra fine cross cut) Bear Saw to remove a half-inch from the bottom of the doorframe and door to accommodate the cementboard, tile and layers of thin-set.


In other news, I have ordered the new tub hardware and have begun looking into options for the threshold transition and baseboard molding. I will definitely not be installing vinyl floor/wall liner similar to the crap that I ripped out. Instead, I am leaning towards a Victorian-style wood trim along the floor, although straight and simple may win out in the spirit of making it as easy as possible to keep clean.

Wednesday, October 04, 2006

nertzed

Just when I think I can’t put off tackling the floor much longer, new challenges and opportunities present themselves. Before I could layout the Hardibacker cement boards so I could make the cuts I would need for complete coverage, I thought I should remove the remaining bathtub plumbing fixtures (water supply lines and drain connection) to make measuring as simple and accurate as possible. Unable to get the drain to pop up through the floor resulted in another excursion into the crawlspace so I could unhook the drain where it connected with the pvc line.


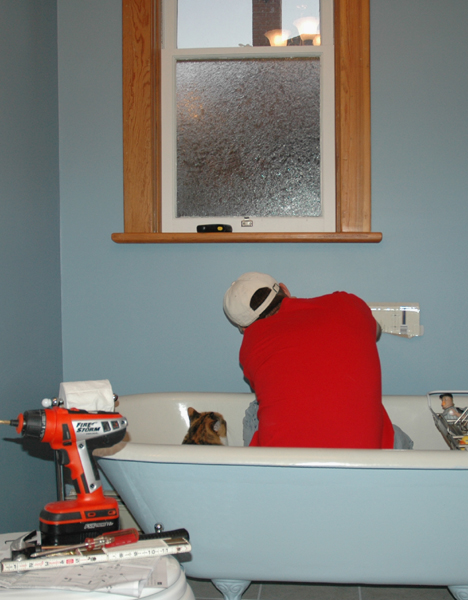
A reader recently asked me if I have any help on this project. Well, I guess it all depends on your definition of help. If you consider the following photo as evidence of “help,” then yes, I have more than I need.


Actually, I am getting a bunch of help via emails and calls from readers who have tips or general encouragement to keep the work moving along.

Another potential issue is the copper pipe that serves as the cold water supply to the tub. After loosening the uppermost nut with my handy pipe wrench and removing the supply line, I noticed that the pipe appears to be busted. I mean, it isn’t an even edge at all, and I can’t imagine that that is how it is “supposed” to look. The hot water supply line on the other hand is quite smooth. (You can’t tell in the photo because I have it taped off to prevent debris from falling into the opening.) Man, I really don’t want to call in a plumber at this point, but I may end up having to do so.


At least I can now make my cuts in the cement board and get that installed. Oh, now I remember what else I wanted to mention. To lay tile near the door jamb, I assume the proper way to do it is to saw about a half-inch off the bottom of the jamb in order to lay the cement board and tile and thinset under it- rather than say, cutting tiles to fit around the bottom of the jamb. If I did that, I would be screwed in the future if I ever needed to remove the door. RIGHT?

Monday, October 02, 2006

renovation blues

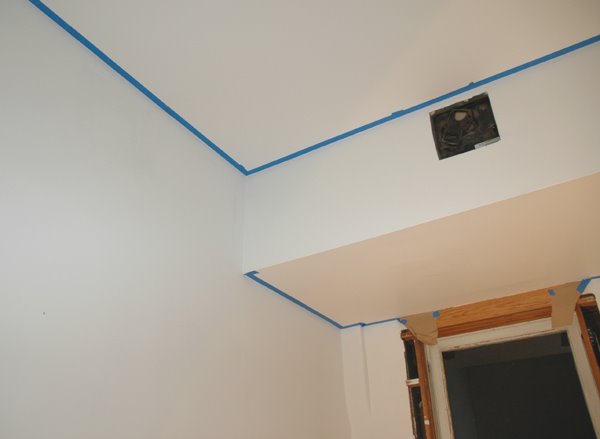
After the primer dried, I applied two coats of “bistro white” American Tradition Signature paint to the ceiling. At the very least, the ceiling will be a millimeter closer to the floor in the event that I ever have to paint it again.


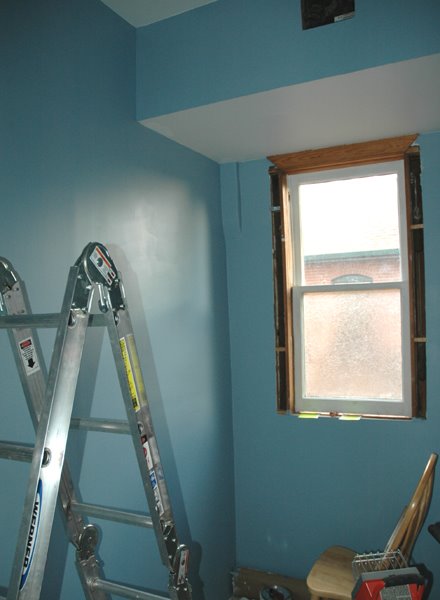
After the ceiling was good and dry, I taped off the margins and started on the walls. The color for the walls is “coventry blue.” Again, I went with the eggshell finish as it is supposed to help hide mistakes. I would say that the paint was very forgiving, and the screw-ups that it couldn’t cover can probably be hidden via some creative picture hanging.


For those of you concerned that both our living room and my office are also shades of blue, fear not- the plan is that they won’t remain anything close to blue (at some point in the future).

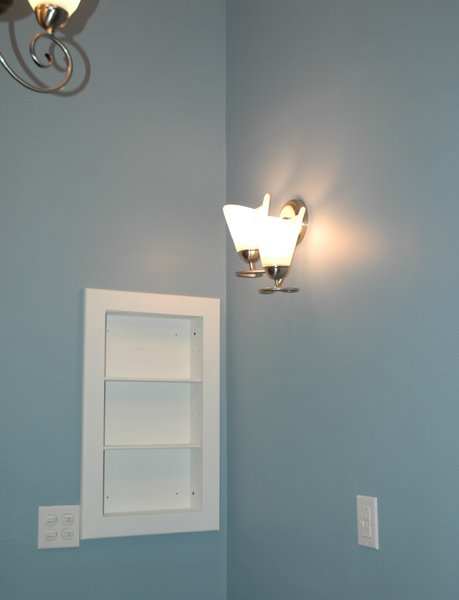
I also installed a new sconce on the wall above the invisible sink and vanity and hung a new chandelier. The trick to hanging a chandelier if you haven’t had the pleasure, is to dangle it nearby using a wire hanger while you connect the wires, disconnect them, reconnect them, then disconnect them and run the wires correctly and reconnect them… well, you get the idea. Using the hanger makes a two-person job into a single person task that allows one to curse as much as they please.


Comparing the new walls to the crappy weathered window resulted in the determination that I also needed to scrape, sand and repaint it as well. I’m definitely not interested in getting into the stripping of the window and this point, so it will remain one of the few painted windows in the original part of the house. I've got a good start on that. At least it will look nice when I'm done.

Saturday, September 30, 2006

in a white room with no curtains

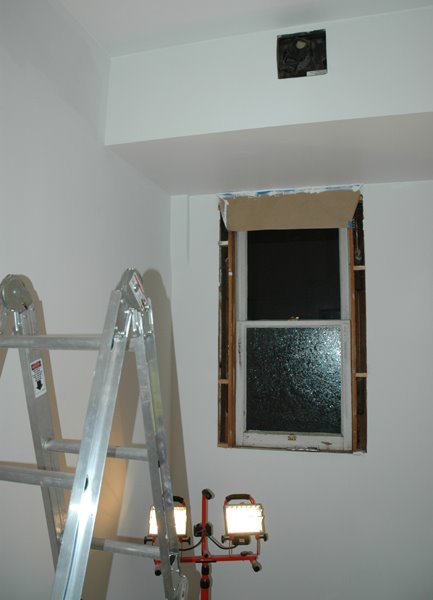
Now that I have the walls covered with primer, the bathroom makes me think of the Cream song “White Room” – a smash single off their 1968 album Wheels of Fire. I’ve heard a ton of ideas what that song was “about,” ranging from drug use to the Vietnam Police Action. I prefer to believe Pete Brown’s explanation that it was simply about his new apartment.


Regardless of its origin, the tune is a shining example of a missed opportunity. Let me explain…

I recently compiled a mix cd for a buddy who is/was wrestling with the notion of pursuing his boyhood dream of becoming a train engineer. The theme of the cd was simply TRAINS. “White Room” would have blended nicely into one of several places on the cd, but as I explained to one of my college roommates (whom I sent a copy of the disc for editorial review) after he busted me for not including Rickie Lee Jones’ “Ghost Train,” there simply wasn’t enough room to include everything I wanted. Incidentally, I also failed to include “Night Train” or “Woody and Dutch on the Slow Train to Peking” – excellent Jones offerings from 1979 and 1981 respectively.

First, a word about the cover art, then I will include a list of the songs that made the cut. The main image is an iconic photo by O. Winston Link entitled “Hot Shot Eastbound.” In the original Link photo, the drive-in screen has a jet plane on it that serves as the exclamation point for an overall fun image. I replaced that portion of the image with a scene from the classic film Runaway Train to make it even more fun, if not completely obscure. If you’ve never seen Runaway Train, the film is capable of making you shiver on the hottest summer night, making it the perfect rental the next time your air conditioner (or evaporative cooler) isn’t doing the trick.


Okay, That’s Not My Harmonica includes the following:

Train Train – Blackfoot
Forever Changed – Lou Reed & John Cale
Mystery Train – Bob Welch
Orange Blossom Special – Lester Flatt & Earl Scruggs
Driver 8 – REM
It Takes a Lot to Laugh, It Takes a Train to Cry – Bob Dylan
Train in the Distance – Paul Simon
Waiting for a Train – Boz Scaggs
Peace Train – 10,000 Maniacs
King of the Road – Roger Miller
Midnight Flyer – The Eagles
Riding on a Railroad – James Taylor
Train of Love – Johnny Ca$h
Silverton Train – C.W. McCall
(Waiting for the) Ghost Train – Madness
Homeward Bound (live) – Paul Simon & George Harrison
Crazy Train (live) – Ozzy Osbourne
Electric Trains – Squeeze
Casey Jones – Warren Zevon & David Lindley
Foggy Mountain Breakdown - Lester Flatt & Earl Scruggs
Downtown Train – Tom Waits
Another Song About a TrainTerrapin Isle
Last Train to Clarksville – The Monkees

As far as I know, I am the first person to attempt a mix cd that contains both Boz Scaggs AND Earl Scruggs. I think it works.

Friday, September 29, 2006

joy in mudville

I finally finished applying joint compound to the drywall. I actually had completed the third coat the day before, but it had some severe cosmetic issues. I didn’t care for the way it looked at all, until I got busy with a sanding screen. Even though using the screen to knock down all the bumps and ridges made all the difference in the world, I also gave the walls a once over with a wet sponge. The sponge allowed me to really smooth out most areas. After stepping back and inspecting my work, I decided to go back and add more mud to the joints where my drywall met the existing wall at 8 feet above the floor. Although it added a full day to the project (mostly drying time), I decided it was the best approach. Otherwise, every time I sat on the throne in the future, I would have to look at the lousy job I had done.

A quick word to any reader who happens to write or edit “do it yourself” books or websites- the rest of you can skip down to the next paragraph. Please stop suggesting that using a wet sponge will prevent the creation of dust. Sure, it creates less dust than sandpaper or a sanding screen or a sand storm, and perhaps that dust is somewhat damp, but it still creates a mess that will have to be cleaned up pretty much immediately.

While waiting for the final sections of wet joint compound to dry so I could sand them, I decided to begin priming the ceiling. I used the remainder of the stain blocking primer I had left over from the bedroom painting as a first coat. I intend to use the same “new construction” primer that I apply to the drywall as a second coat for consistency. I’m not sure if I will have to add a third coat of primer to the ceiling since I am going from a mottled navy blue and smoker’s white to a plain, “bistro” white. I’m also going from a disgusting semi-gloss ceiling to an eggshell finish so I am prepared for some coverage issues.

Switching gears… tonight I killed the largest black widow I have ever seen. It was outside “hiding” under the faucet that controls the garden hose. I guess she was hunting for gardeners. Over all, I saw significantly fewer black widows this year (a couple dozen) than the previous year (when I was killing up to 15-20 per night). I attribute the lower density to the fact that the house and two garages next door hadn’t just been gutted, and also because I had filled in all the crevasses and voids in the adobe brick garden beds with wet adobe- thereby removing a vast majority of their potential habitat. On the other hand, perhaps they have simply improved their ability to remain undetected.

I’ve also been noticing a higher population of praying mantids. This time of year appears to be their mating season, and they tend to congregate near the floodlights on the side of the house and garage where they can eat moths as long as they want. So far, only one male mantid has ventured into the house- via the open bathroom window. When I asked if he had been reading my blog he quietly cocked his head to one side and stared at me as if I was crazy.

Tuesday, September 26, 2006

down in the dumps

So I’m sitting here in my group W office chair waiting for the second coat of joint compound to dry. I figure I have time to compose a progress report before I apply the third (and hopefully final) coat.


Obviously I got all the drywall up. I used regular ½-inch panels across the majority of the room, but installed special water-resistant (not to be confused with “water-proof”) “aquablocker” board in the areas adjacent to the where the tub and sink will live.


I recently made a quick trip to Home Depot for one last sheet of drywall I required to finish up. I needed to have it cut in half, so I rounded up a likely candidate– i.e., the nearest “orange vest” who had a utility knife dangling from his belt. Let me tell you, this clown seemed determined on putting the “Ass” back in Associate.

“We don’t cut drywall,” he proclaimed while standing on a low mound of drywall remnants.

“You don’t cut drywall?” I replied, “Okay, I’ll go to Lowe’s.”

And with those magic words, the kid sprung into action and scored the drywall panel so we could snap it more or less in half. I’m not sure if he was just a slacker, or if it is Home Depot’s policy to try to get customers to buy utility knives that they don’t really need. Nevertheless, I keep saying that I won’t go back there, yet I do because they are about 2.3 miles closer than Lowe’s.

Over the weekend, I hauled a truckload of bathroom debris to the local solid waste plant. That is a very interesting place, but I wouldn’t want to work there. The dump has large signs posted at the entry indicating that they don’t accept construction materials, but I don’t think my old drywall and tiles counted given that they technically were destruction materials. It is really fun to back the truck up to the edge of this concrete pit and toss things into a heap while a backhoe operator waits to shove it into different piles. I also took advantage of the opportunity to unload a number of large cardboard boxes that I had filled with nasty weeds from the garden and alley. To be sure, utilization of the dump is a bargain at only $3.60 per load.

As for the renovation, lighting has been selected and purchased. I have examined both the ceiling light and wall sconce, and am about 97 percent certain they will work fine.

I’ve also been refurbishing an old wooden medicine cabinet, converting it into a simple shelf unit that will be set into the north wall of the room. I believe I have a photo that illustrates where that will go.


If progress continues without setbacks, I should have the walls sanded and primed by the end of the Major League Baseball regular season.

Thursday, September 21, 2006

news from the front

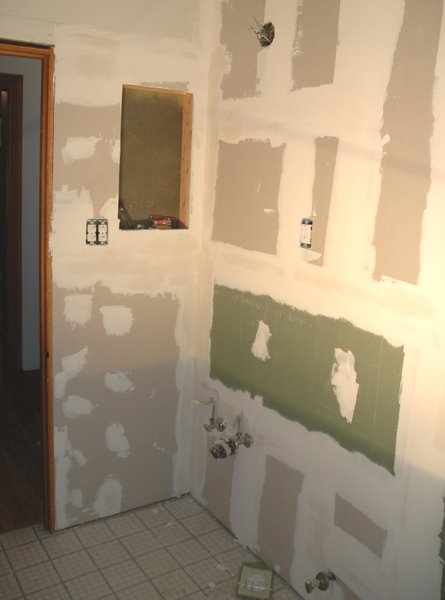
Day um… aw heck, I’ve lost track already. At any rate, I don’t think I’m going to set any records for my bathroom renovation project. I have about half of the drywall up now, and have roughed in some support for a shelf that I will be installing into the north wall.

My befuddlement as to why the porch light stops working when I flip the circuit breaker that controls the majority of the bathroom had me once again rooting around in the crawlspace under the western portion of the house. I imagine the web of cables would make sense to the spider that ran them, or perhaps even to a professional electrician- but not so much to me.

I found another interesting artifact in the dirt worth mentioning. It is nearly a page and a half of the Albuquerque Tribune dated September 22, 1944 (that makes it 62 years old tomorrow). It is pretty kool- especially the funny ads for everyday items. It contains part of an article about allied troops taking an important bridge, an obituary for a local boy killed in action in France, a 50th wedding anniversary announcement, and part of the Major League Baseball standings (which I found particularly interesting).


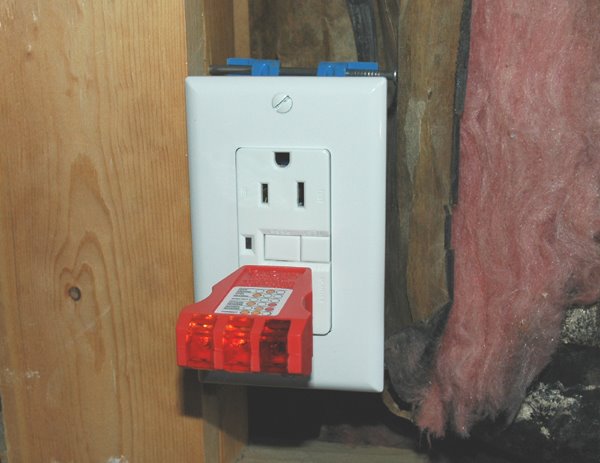
The paper fragment contains all kinds of intriguing information, but I decided that I would have to save it to read at a later date, as I needed to get back to work on the bathroom. I did replace the regular old outlet with a brand new GFCI receptacle in order to check off the first item from the electrical “to do” list.


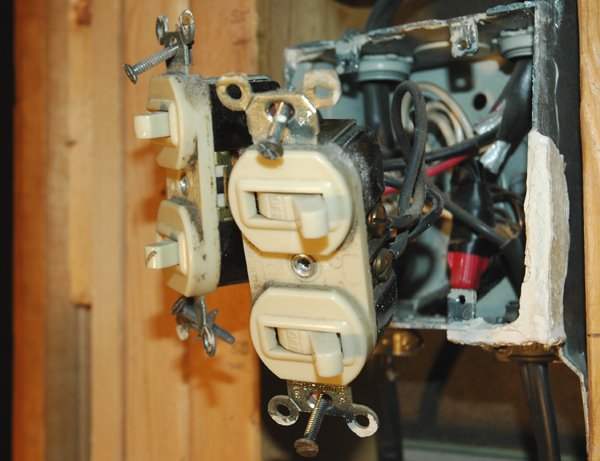
Then I took a deep breath and pulled out the double light switches on the north wall that control the ceiling light, sconce light, fan and wall heater. What a tangled mess! It didn’t look like what I was expecting, so I took some time and consulted my reference books and a few electrical websites. Half a bag of candy corn later I had formulated my plan of attack.


Everything went well, and I actually had one piece of wire left over. Great Bill Schmidt’s ghost! Someone had taken a strip of bare copper wire and run it between both live terminals on one of the switches. After I figured out that they had done so in order to use it in the manner of a brand new switch that hadn’t had that little copper plate broken off, I felt relieved. Surely that isn’t the best way to have done it.


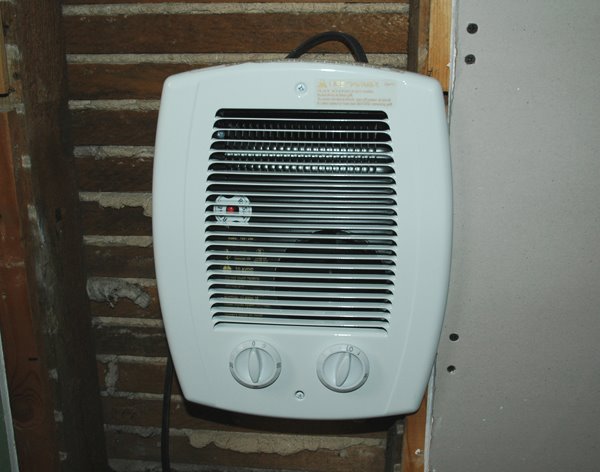
On a roll, I ripped out the old rough in can for the crap wall heater and had the replacement one installed, wired and operating in just over two hours. Not bad at all!


Now I have more drywall to hang, and it is time to select the lighting.